Want to add some style to your home without breaking the bank? DIY floating shelves are the way to go! They’re simple to make, offer a chic look, and can easily fit your personal style, allowing you to showcase your favorite decorations. Let’s dive in and explore how to create these sleek shelves that will have everyone guessing where you bought them!
Creative Designs to Enhance Your Space
Floating shelves are a stylish way to maximize your wall space while also adding a personal touch. In the image, we see a beautifully arranged set of wooden shelves that create a warm and inviting atmosphere. The natural wood color contrasts nicely with the light walls, making the shelves stand out as a focal point.
These shelves are not just functional; they can also showcase your personality. The mix of books, decorative items, and a small bouquet of flowers creates a balanced look that feels curated yet casual. You can play with different heights and arrangements to find a style that suits your taste.
To replicate this look, consider choosing materials that complement your existing decor. Using warm wood tones can add warmth and coziness to any room. Don’t forget to mix in some personal items, like travel souvenirs or family photos, to make the space uniquely yours.
Choosing the Right Materials for Durability
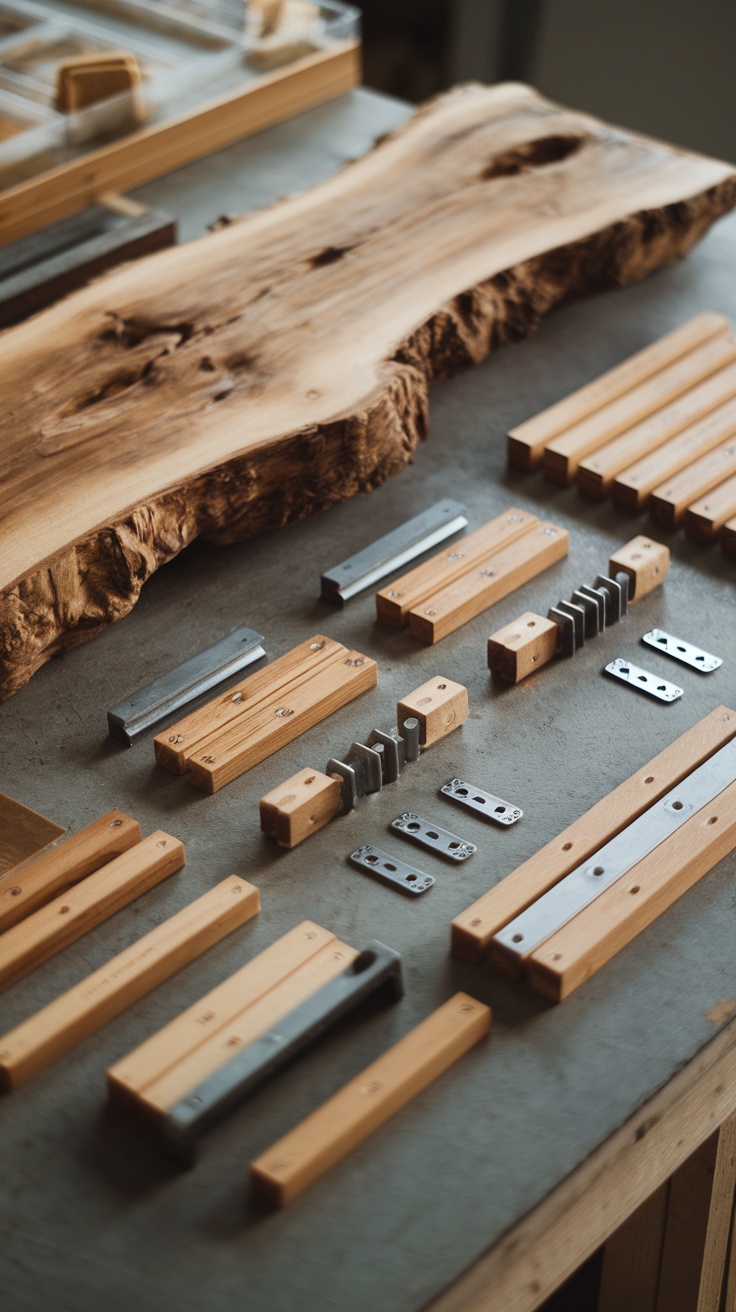
When crafting your own floating shelves, selecting the right materials is key to ensuring they not only look chic but also stand the test of time. In the image, you can see a beautiful slab of wood paired with various wooden and metal components. This combination is perfect for creating shelves that feel both rustic and modern.
Start with the wood. Opt for hardwoods like oak or maple as they offer strength and durability. The wood slab in the photo shows natural grain patterns that add character, making your shelves unique.
Next, consider the supporting hardware. The metal pieces laid out neatly are crucial for stability. Using brackets or other metal supports can enhance the durability of the shelves. Choose rust-resistant materials if your shelves will be exposed to moisture.
Additionally, finish your wood with a sealant. This protects against everyday wear and tear and keeps the wood looking fresh. A clear finish can help maintain the natural beauty of the wood while providing essential protection.
Achieving a Professional Finish with Stains
When it comes to DIY floating shelves, the finish can make all the difference. Using stains enhances the natural beauty of the wood, giving your project a polished look. In the image, you can see rich, warm tones on the shelves, which blend nicely with the surrounding materials.
Start by choosing a stain that complements your space. Test it on a scrap piece of wood first to be sure you love the color. Once you’ve selected your stain, apply it with a brush or cloth, working in the direction of the wood grain. This technique helps achieve a smooth application.
Don’t rush this step! Allow the stain to penetrate for a few minutes before wiping off the excess. This will help create an even finish. If you want a deeper color, apply a second coat after the first has dried. Just remember to wait the recommended time according to the stain’s instructions.
Finally, consider adding a protective topcoat. A clear polyurethane can provide durability while enhancing the color of the stain. The shelves in the image not only look inviting but also show how effective a simple stain can be in achieving that store-bought vibe in your home.
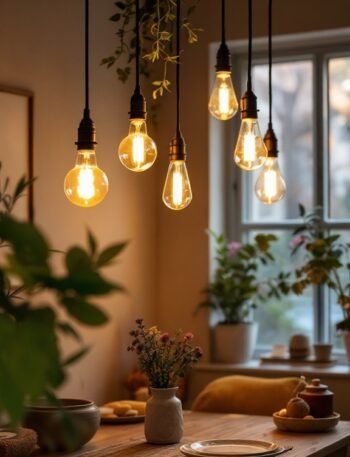
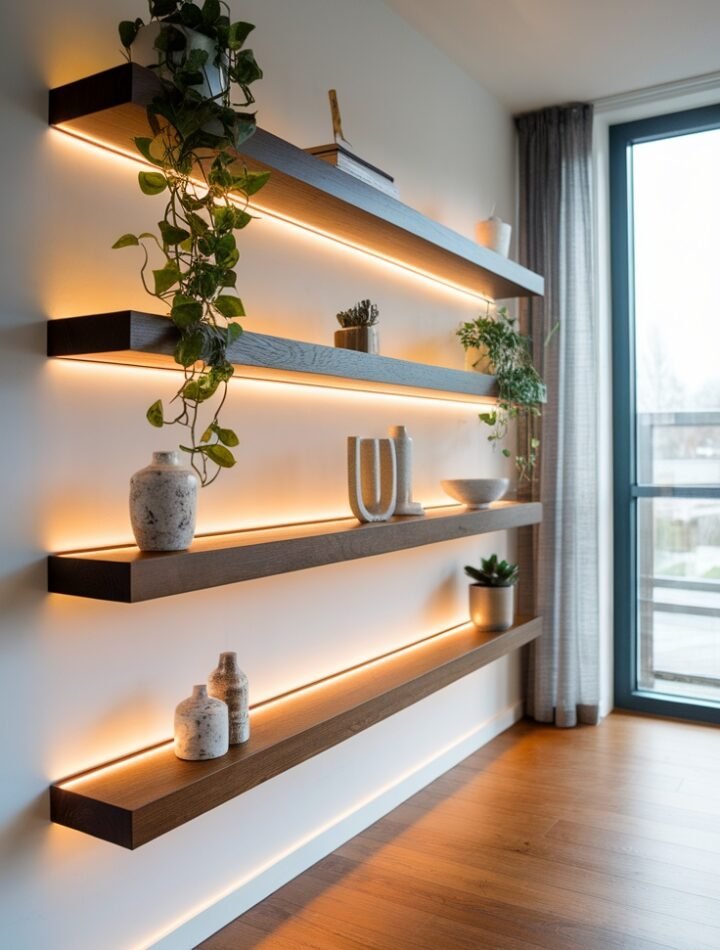
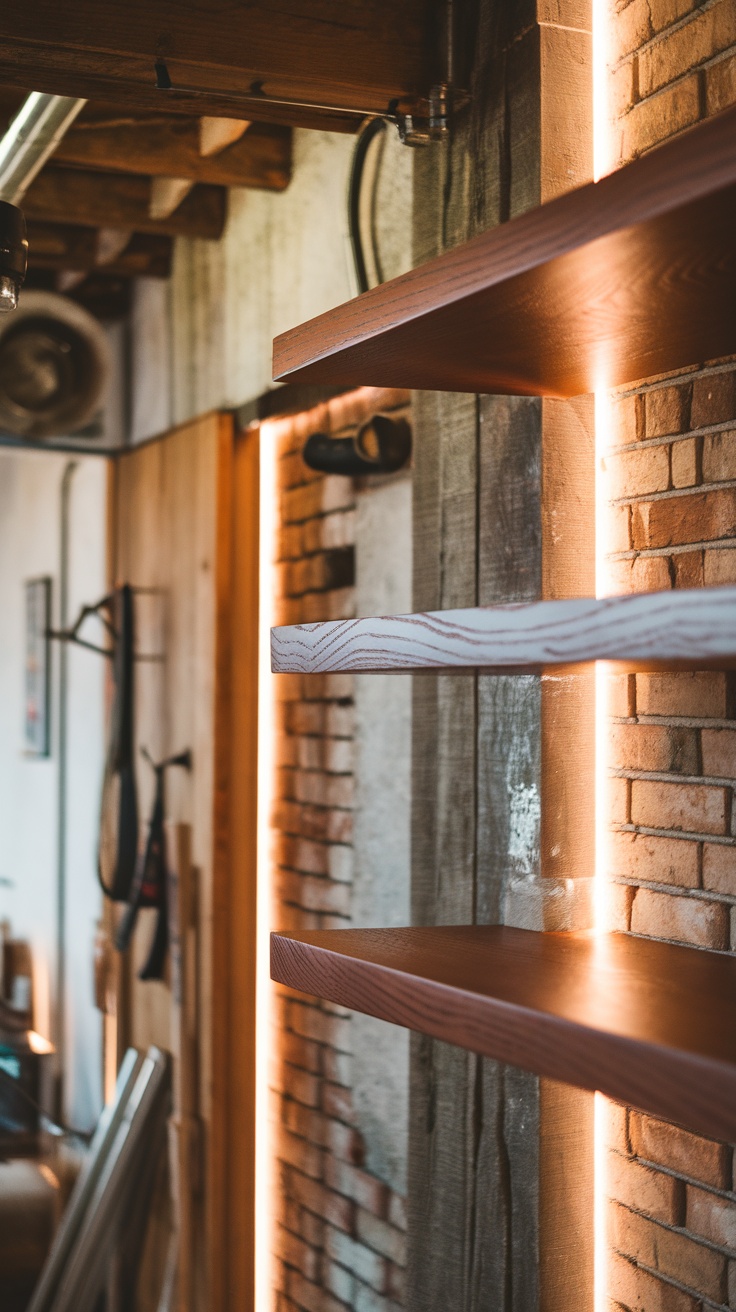
Incorporating Lighting for Ambiance
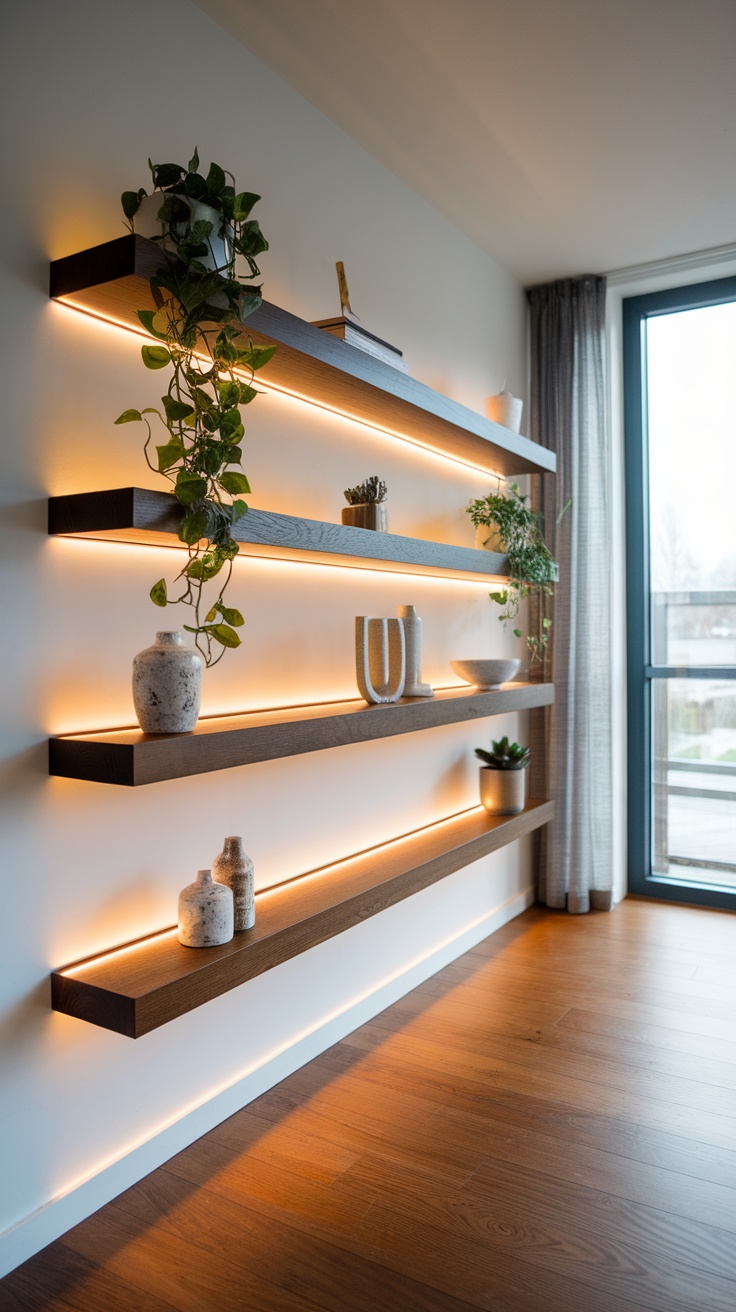
Adding lighting to your floating shelves can elevate their look and create a cozy atmosphere in your space. In the image, warm LED strips are subtly integrated along the edges of the shelves. This not only highlights the items displayed but also casts a gentle glow in the room.
Think about what you want to showcase. Plants, decorative vases, and books all look inviting under soft lighting. In the provided picture, greenery is charmingly illuminated, enhancing its natural beauty. This balance between functionality and aesthetics is key.
To achieve a similar look, you can choose from various lighting options such as battery-operated LED strips or plug-in fairy lights. The key is to select lighting that complements the style of your shelves and the overall room design.
Don’t hesitate to experiment with placement. Lighting that washes over the shelves or shines directly down can dramatically change the ambiance. Test different positions to find what works best for you. With a little creativity, your DIY floating shelves can truly shine.
Step-by-Step Assembly Instructions
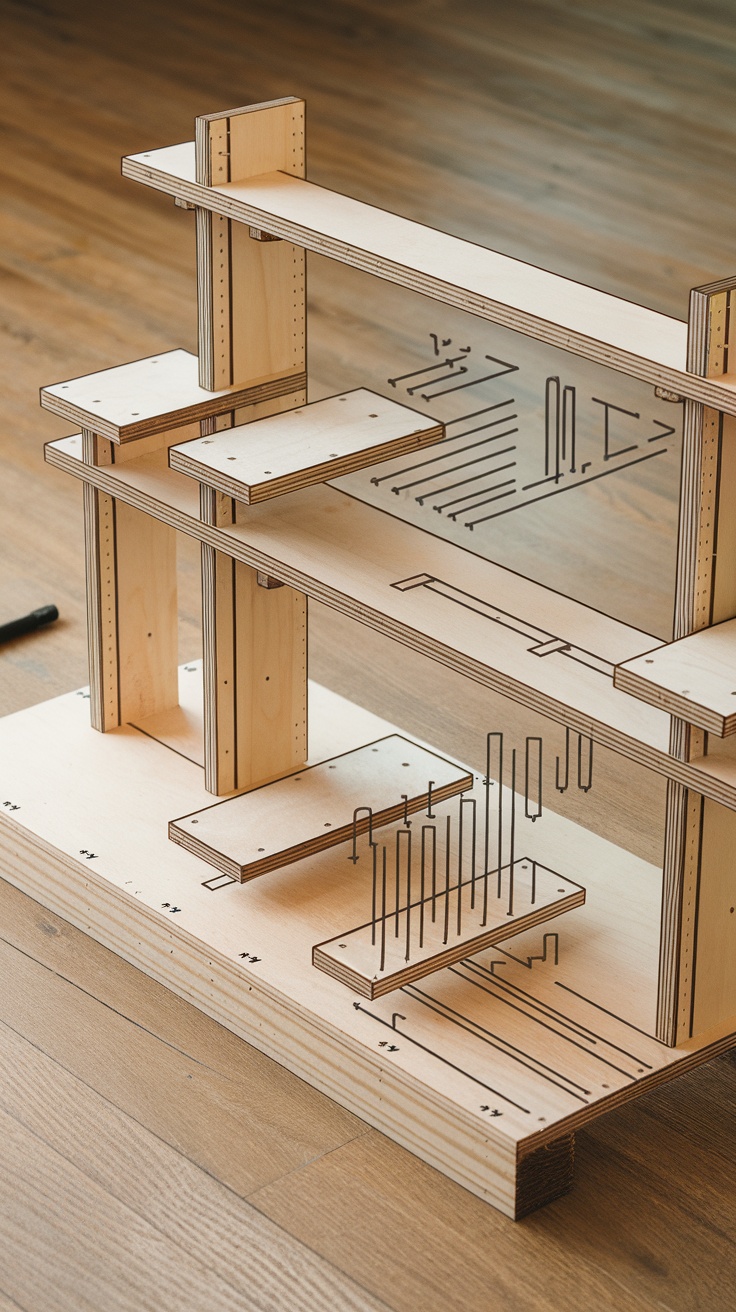
Building your own floating shelves can be a fun project. The image above showcases the components needed for assembly, giving you a clear idea of what to expect. You’ll see various wooden pieces laid out, each designed to fit together seamlessly. This setup not only looks appealing but also provides a sturdy foundation for your shelves.
Start by gathering all your materials. In the image, you can spot different lengths of wood that will form the shelves and supports. Make sure to have the necessary tools on hand, like a drill and screws, to make the assembly smooth.
Next, follow the outlined markings on the wood. These are crucial for ensuring all pieces align perfectly, providing a clean and professional look. Lay out the pieces as shown in the image to visualize how they will come together.
Once you’ve laid everything out, it’s time to drill pilot holes as indicated. This step is vital for avoiding splintering the wood when you drive in the screws. After drilling, attach the pieces together firmly. The clever design of the shelves, as seen in the image, allows for easy assembly without sacrificing strength.
Once assembled, it’s important to securely mount the shelves on your wall. Make sure to use proper anchors suitable for your wall type. This ensures that your shelves not only look good but also hold up your favorite items safely. Take your time and enjoy the process!
Mixing Materials for a Unique Look
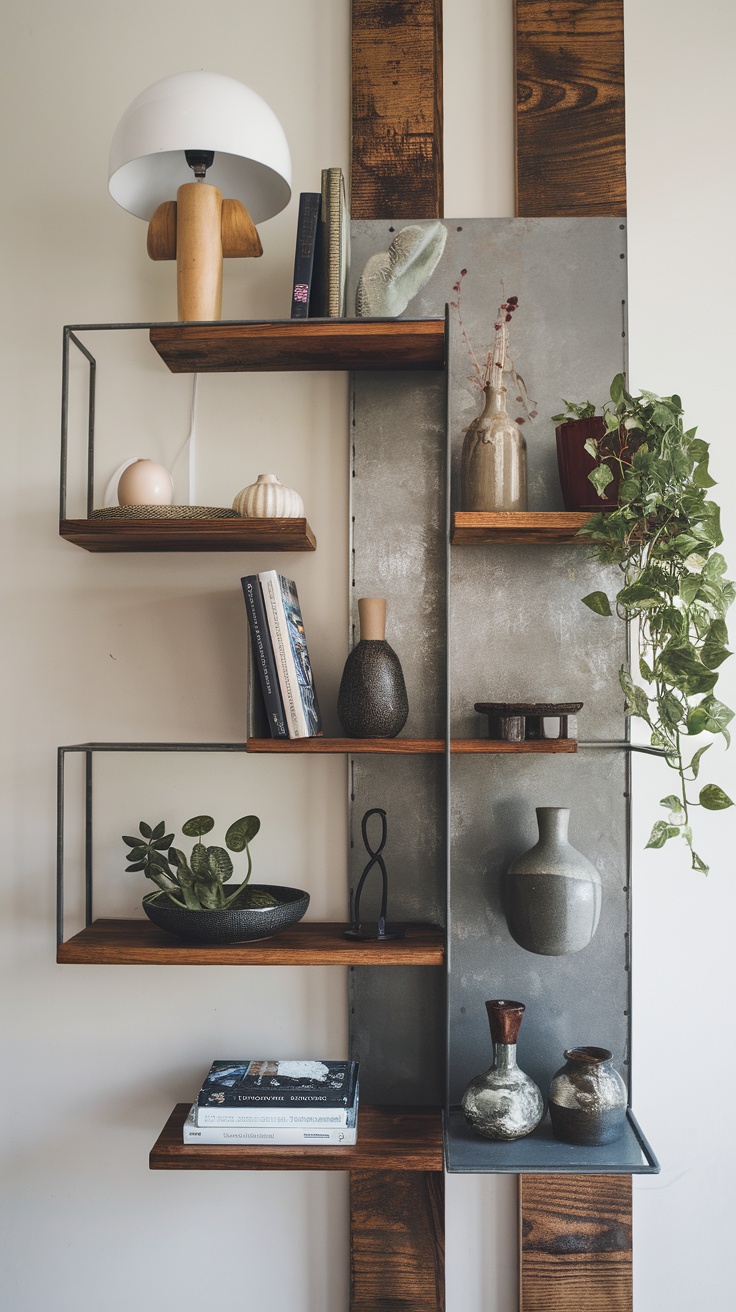
Incorporating different materials into your floating shelves can really elevate your space. The image showcases a blend of wood, metal, and ceramic, creating a rich visual texture that feels both modern and inviting.
The wooden shelves contrast beautifully with the sleek metal framework, adding warmth against the industrial backdrop. This combination not only enhances the aesthetic but also allows for personal expression through various materials.
Take a closer look at the decorative items. From the earthy ceramic vases to the stylish books and greenery, each piece adds character. This mix of materials and textures helps achieve that refined, store-bought look without costing a fortune.
When planning your own shelves, consider using reclaimed wood for a rustic touch, alongside metal brackets for stability. Add in some unique ceramics or playful decor elements to make the design truly your own. It’s all about mixing elements that reflect your personality, so have fun with it!
Using Brackets for Extra Support
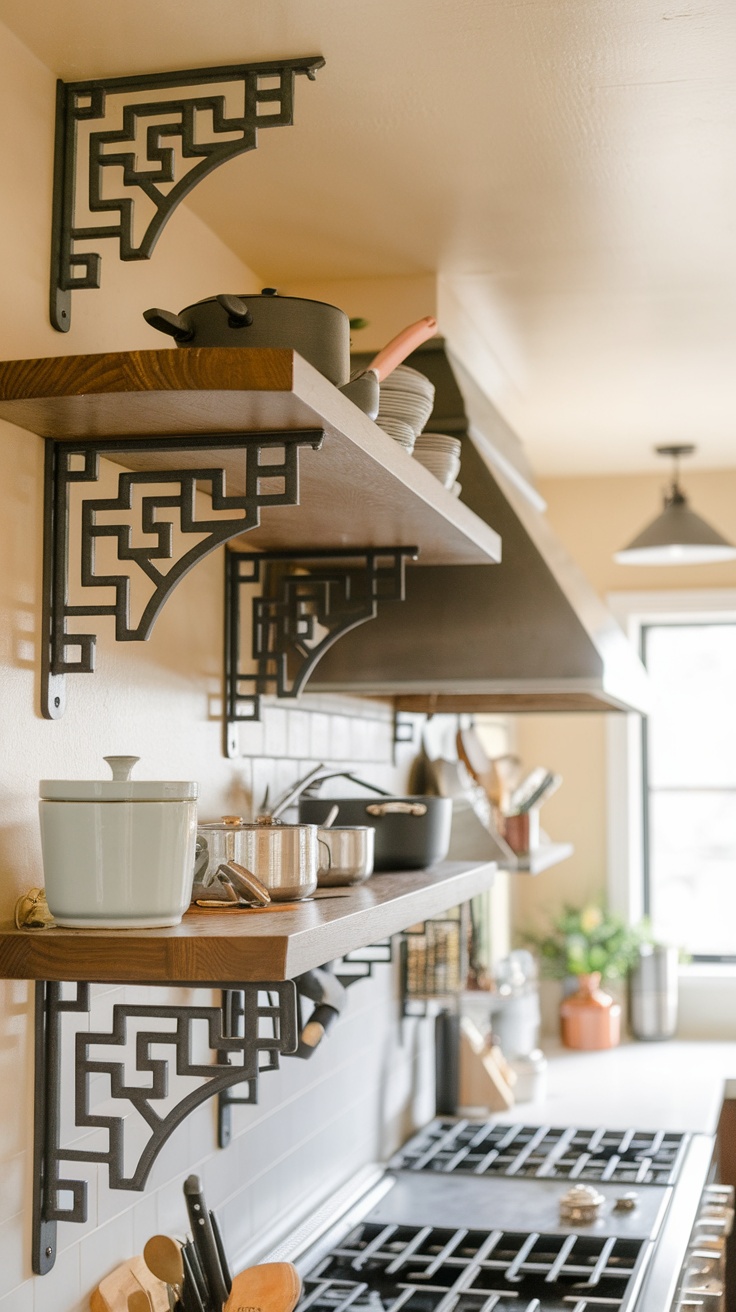
When it comes to DIY floating shelves, using brackets is a smart way to add extra support while keeping things stylish. The image shows some beautifully designed brackets that not only hold the shelves securely but also enhance the overall look of the kitchen.
These brackets come in various styles, but the geometric pattern seen here adds a modern touch. They make the shelves feel more anchored, especially when you’re displaying heavier items like pots or decorative dishes. It’s essential to choose brackets that match the aesthetic of your space, as they can be a focal point on their own.
Placement is key! Make sure to install the brackets at the correct height and spacing to distribute weight evenly. This can prevent sagging and keep your shelves looking neat. Plus, using brackets gives you the flexibility to change out shelves or decor without worrying about stability.
When you think about floating shelves, don’t forget about function. With the right brackets, you can create a beautiful setup that feels just as polished as store-bought options. So, grab your tools and get ready to elevate your space with some chic and sturdy shelves!
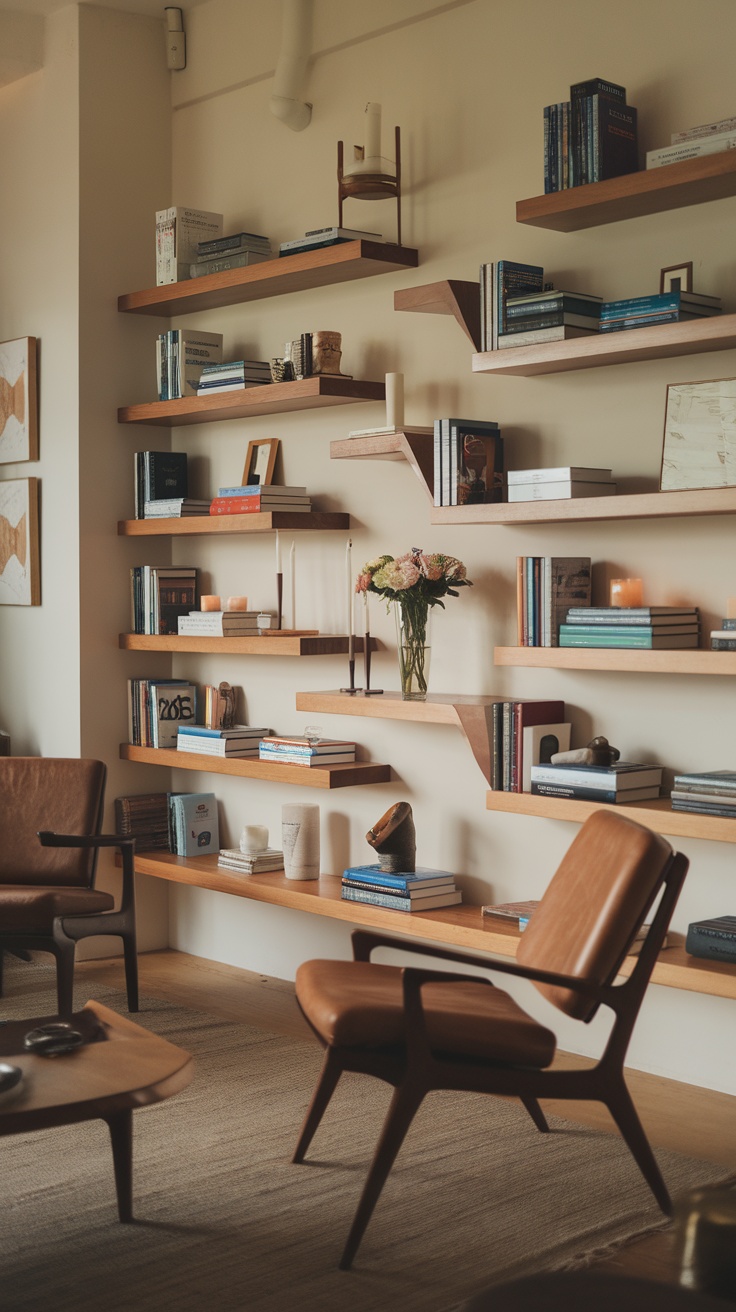
Perfect Placement Ideas for Functionality
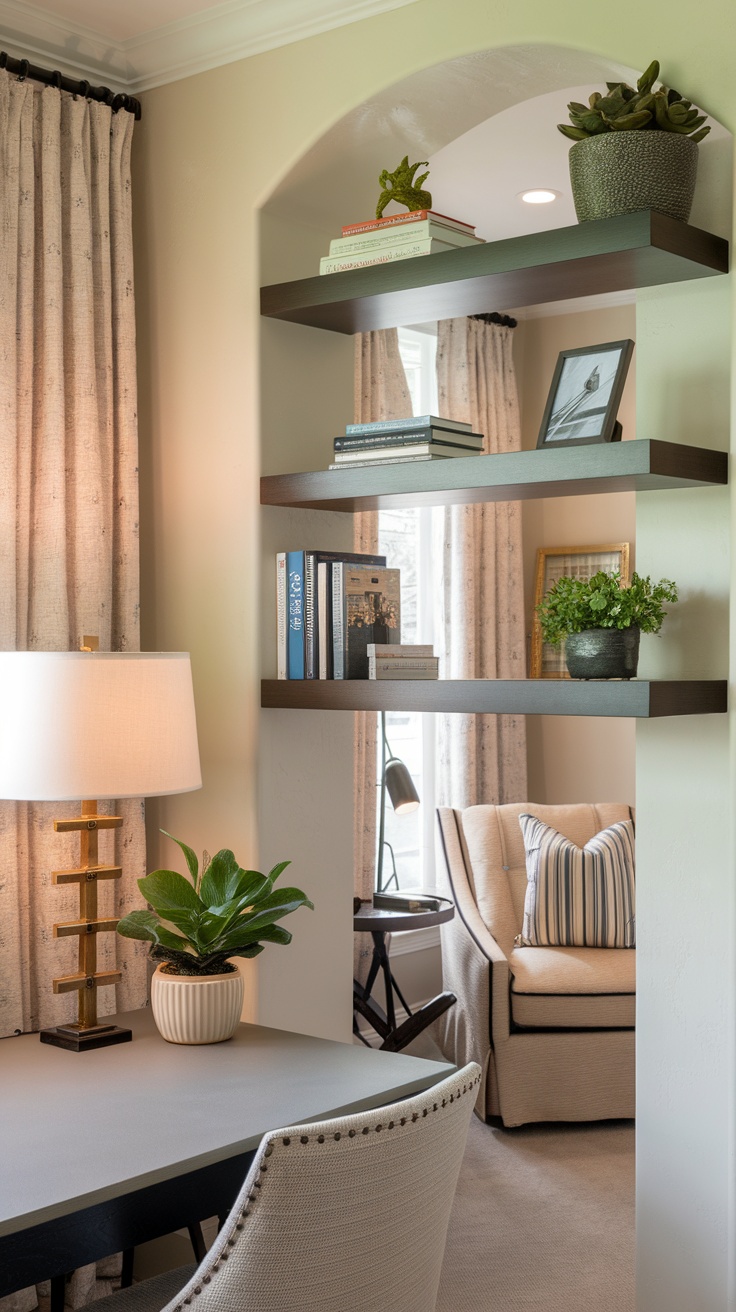
When it comes to floating shelves, placement is key for both style and functionality. The image shows a well-thought-out arrangement that balances aesthetics with practical use. The shelves are neatly positioned in a cozy corner, creating a focal point without overwhelming the space.
Consider placing floating shelves above a desk or in a reading nook. This allows you to easily access your favorite books or display decorative items that inspire creativity. In the image, the shelves are adorned with books and plants, adding life and personality to the area.
Another great spot for floating shelves is in entryways. They can hold keys, small plants, or decorative bowls, making it easy to grab what you need on your way out. The image nicely illustrates how shelves can fit seamlessly into different room styles, enhancing the overall look of your home.
Lastly, don’t forget about the kitchen! Floating shelves can store spices, cookbooks, or even decorative dishware. The key is to find the right height and spacing that works for you, just like the careful arrangement seen in the image. With a bit of planning, your floating shelves can provide both beauty and utility.
Customizing Sizes to Fit Any Space
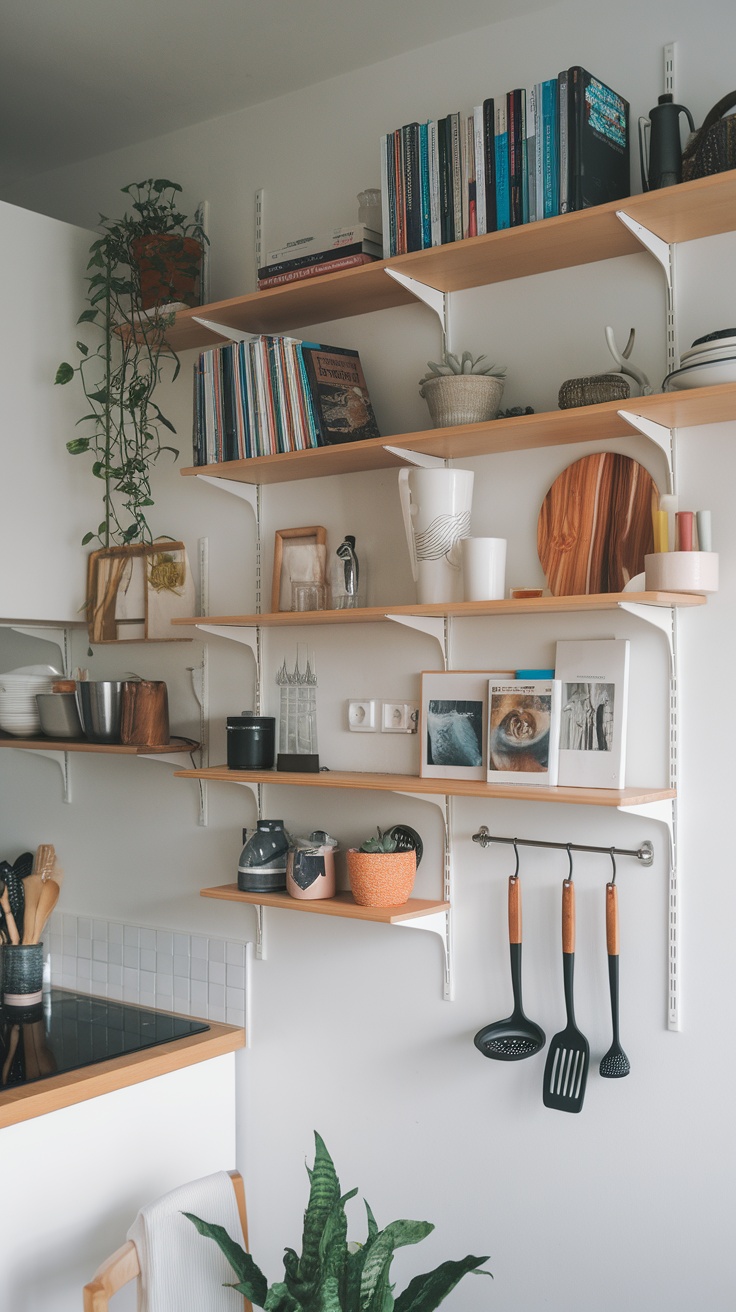
When it comes to DIY floating shelves, one of the best features is the ability to customize their sizes. This image shows a well-organized shelf setup that fits snugly in a kitchen area. The varying shelf depths and placements allow for a mix of decor and practical items, proving that you can make it work in any corner of your home.
Think about your space. Do you want a long, continuous shelf to display your favorite books and plants? Or perhaps a few smaller, staggered shelves for a trendy look? By measuring your wall and choosing dimensions that suit your needs, you can create a display that feels just right.
Consider using brackets that can support different shelf sizes. This flexibility helps you adapt the design as your needs change. In the image, the combination of shelves holds everything from books to decorative items, showcasing how versatile and functional customized shelves can be.
Don’t forget about the height! Adjusting the height of your shelves can make a big difference in how the space feels. Higher shelves can draw the eye upward, making a room feel larger, while lower shelves can be more accessible and cozy. Play around with different heights to see what works best for your space.
Maintaining Balance with Shelf Styling
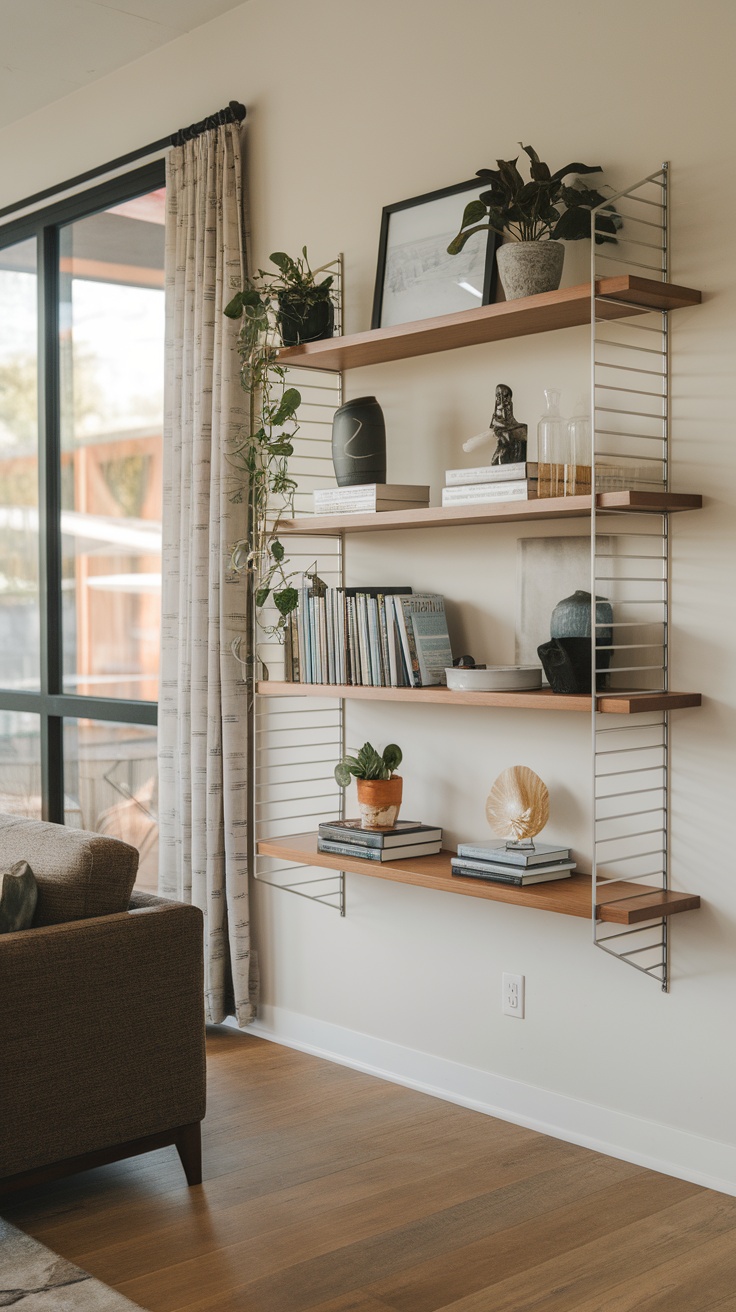
When designing your DIY floating shelves, balance is essential for a polished look. The image showcases shelves that beautifully blend functionality with style. The clean lines and wood accents create an inviting atmosphere, making it the perfect backdrop for your favorite decor.
Notice how the shelves are filled with a variety of items, including plants, books, and decorative objects. Each piece adds character and depth, while the greenery brings a touch of nature indoors. Using different heights and textures contributes to a balanced visual appeal.
Think about how you can layer your items. For example, placing taller objects at the back and smaller ones in front creates depth. You can also group similar items together, like the stacked books or the clusters of plants, to create a cohesive look.
Don’t forget to incorporate negative space. Leaving some areas empty prevents the shelves from feeling cluttered and allows each piece to stand out. This approach not only enhances the aesthetic but also makes it easier to change or update your styling over time.
Ultimately, the goal is to create a space that reflects your personality. Whether you prefer minimalistic designs or a more eclectic mix, finding the right balance will make your floating shelves look as if they were bought straight from a store.